Watch the tutorial: Architecture Design Workflow Tutorial EP.05 | Image, Animation, Post-production | D5 Render
You can render stunning images and animations using D5 Render.
Image

AI Style Transfer
 Click the AI post-processing button to activate the tool.

D5 Render provides both stylized and realistic styles. Simply choose the style you need and click the transfer button. The integration will be automatically completed, without any material or model adjustments.
 Watercolor style transfer
 Autumn style transfer
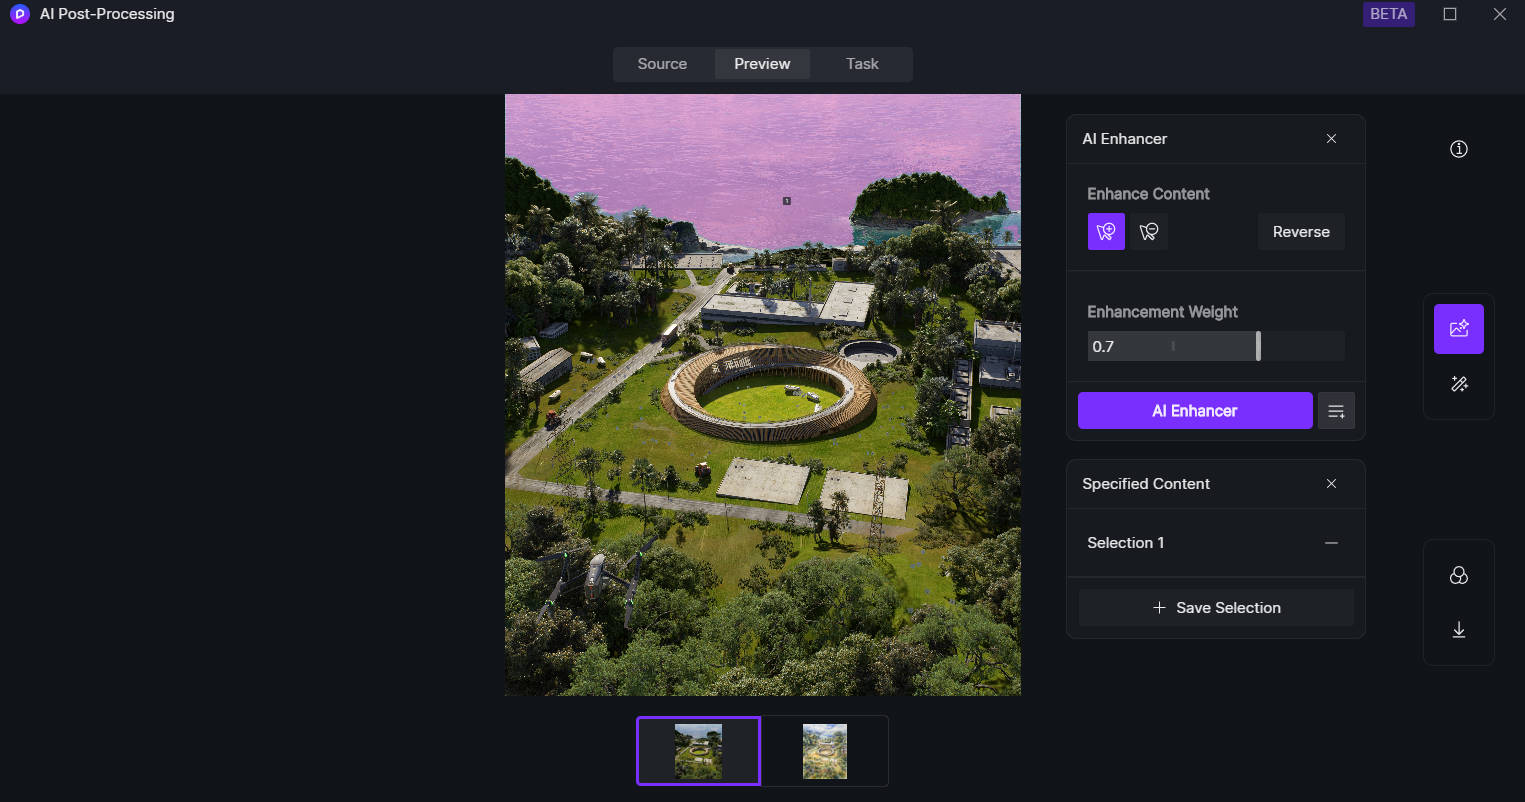
AI Enhancer


Animation
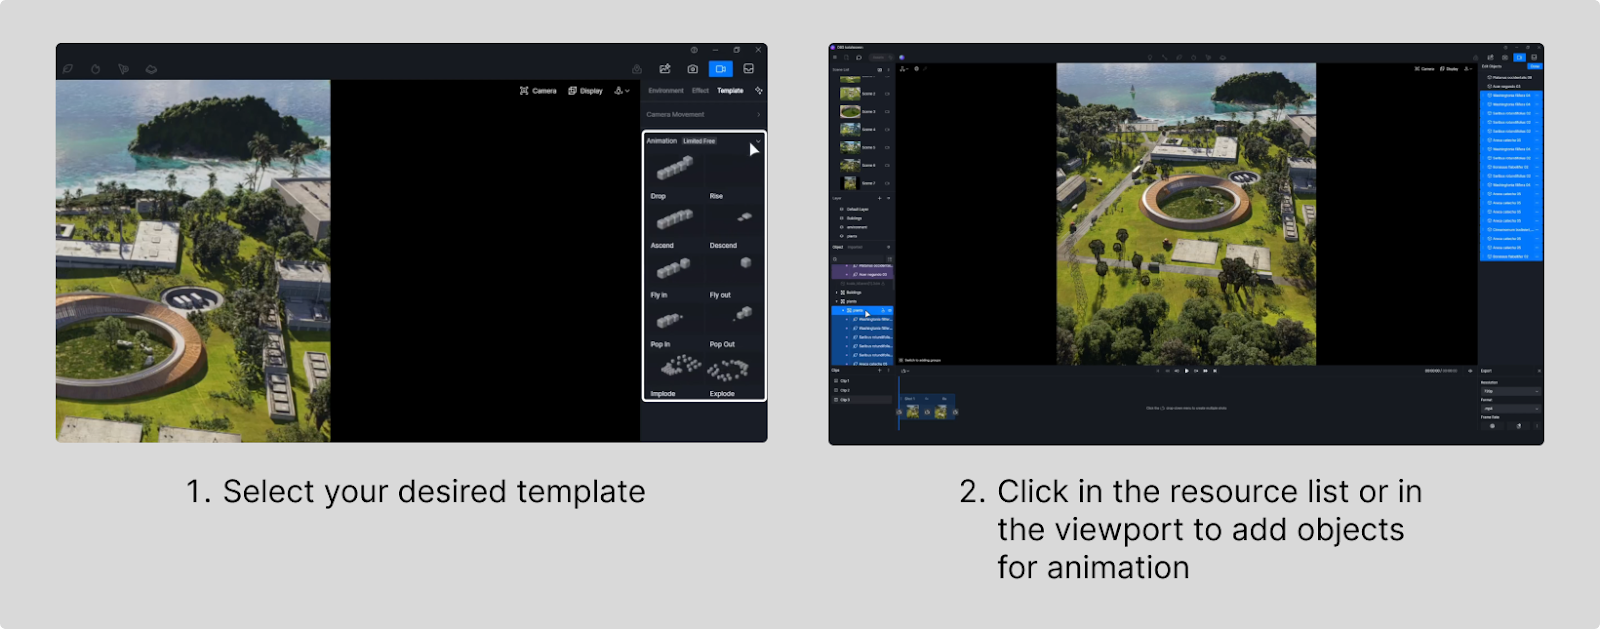
 Camera Movement

 Next, modify the movement degree which determines the travel distance for your camera. Now, a rotating camera is set up.
 If you prefer to start from scratch, simply add a view as the initial frame, adjust the camera, and set the final frame. A shot will be generated accordingly.

*Note that you can use D5 LiveSync plugins for SketchUp, Revit, Rhino, and 3ds Max to export models while retaining their group/layer/family structure after importing them to D5. Support for more workflows will be updated in the future.
After selecting your desired effect, you can click to add the objects for animation. D5 Render enables you to add objects individually or in groups. Under the “add by group” mode, you can click a group to add all the models it includes.

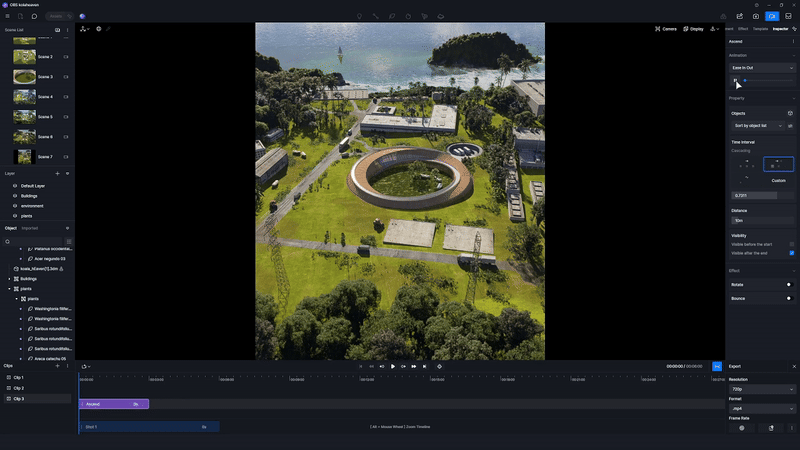

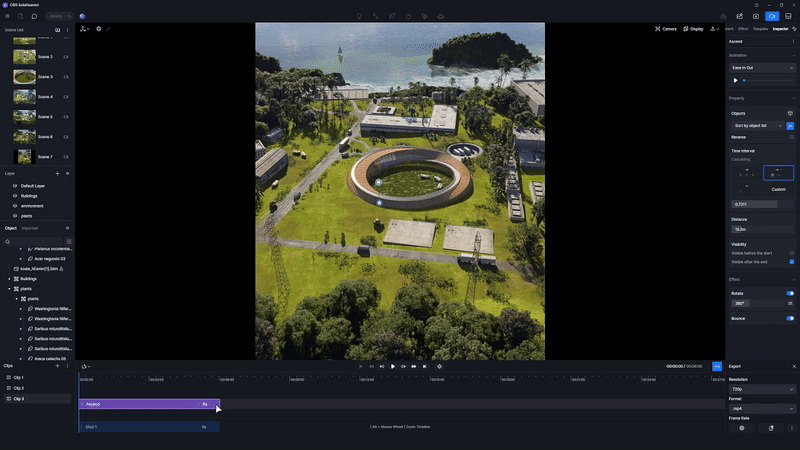
Adjust the motion distance of each object and the time interval between their movements to achieve a more polished effect.

You can add extra fun effects like rotation and bouncing.
Was this article helpful?
That’s Great!
Thank you for your feedback
Sorry! We couldn't be helpful
Thank you for your feedback
Feedback sent
We appreciate your effort and will try to fix the article